.

Monday, 11 April 2016

Android / [STICKY] Step by Step guide to creating a working .APK file

Step by Step guide to creating a working .APK file

First off, update to the latest version of AGK (v108) and make sure you have your AGK app finished and ready to go! then follow these steps.

Follow these steps exactly, everything is case sensitive!
----------------------------

1./ Press "START + E" on your keyboard to open windows explorer

2./ double click on your "C:" to open it

3./ make a new folder here called "Android"

4./ download eclipse classic (32bit version NOT 64 even if you have 64bit) from http://www.eclipse.org/downloads/

5./ copy the downloaded ZIP file of eclipse into your "Android" folder and extract it. you should now have a new folder called "eclipse" in your "Android" folder

6./ goto http://www.oracle.com/technetwork/java/javase/downloads/jdk7-downloads-1880260.html and download the Java SE development kit 7 (JDK 7) for your operating system (can be 32 or 64bit)

7./ install JDK 7

---------------------------------
ANDROID SDK

8./ goto http://dl.google.com/android/installer_r17-windows.exe the download should start automatically.

9./ once downloaded click on installer_r17-windows.exe to launch the installer (dont just click through! read the next steps!)

10./ on the first screen of the installation make sure it says "Java SE Development kit (JDK) version 7 has been found" - if not then close installation and repeat step 7.

11./ on the next screen of the installation it will ask you for a destination folder, change it to "C:\Android\android-sdk" and click next then install, once the files have finished installing make sure the "Start SDK manager" box is ticked and click "Finish"

12./ The Android SDK manager will now launch, wait for it to fetch all the files, then remove all ticks from all boxes next to the packages

13./ you may have to install an upgrade to Android SDK Tools and Platform (the first 2 tick boxes) so make sure nothing is ticked then tick the "Android SDK Tools" box and the platform one underneath it.

13./ place a tick in the "obsolete" box and tick the "Android 2.3.1" box, and also the Android 3.2 box, and the google USB driver box near the bottom, make sure nothing else is ticked. now click install packages, tick accept all and install.

14./ It will now install the SDK packages, if you see a red error code saying "Stopping ADB server failed", just ignore it. once done close the SDK manager.

----------------------------------
ECLIPSE SOFTWARE INSTALLATION

15./ navigate to you C:/Android folder and create a new folder called "Workspace"

16./ navigate to C:/Android/eclipse and double click on eclipse.exe to launch it.

17./ you will see a box asking for a workspace destination folder, click browse and select the newly created "Workspace" folder in your Android folder. tick the "do not ask again" box and click ok.

18./ once the IDE has launched, click on "Help" then "Install New Software"

19./ Click "Add" in the top right corner

20./ in the name field type in ADT plugin

21./ in the address bar underneath type in "https://dl-ssl.google.com/android/eclipse/" and click ok (if this fails then try "http" instead of "https")

22./ wait for second for the software to show up then place a tick in "Developer Tools" and click next, accept the terms of license agreements and click on finish, it will start installing the software, if you get a security warning saying the software includes unsigned software then just click ok and let it continue. you may also get a firewall warning, make sure you allow full access if you do.

23./ click restart now when it asks you.

24./ once eclipse has restarted, click "Window" then "Preferences" and click on "Android" from the list on the left. make sure the SDK location is set to "C:/Android/android-sdk" if it isn't then change it to this location. click ok

25./ click on "Help" then "Install New Software", at the top there is a drop down menu, click it and select "All Available Sites"

26./ scroll down through the list that it creates until you see "Programming Languages", click on the expand icon next to it while ensuring that you dont tick the box, now you should see "C/C++ Development Tools", place a tick next to that and click NEXT

27./ accept agreements and click finish, wait for software to install then click "restart now", once restarted, close eclipse.

----------------------------------
ANDROID NDK R8D

28./ goto http://developer.android.com/tools/sdk/ndk/index.html and download the "android-ndk-r8d-windows.zip" file

29./ navigate to your C:/Android folder and place this ZIP file in there and extract it

----------------------------------
INSTALL CYGWIN

30./ goto http://cygwin.com/install.html and click the hyperlink in the first sentence which says "setup.exe" which will download the file.

31./ run the setup.exe file, click next on the 1st page, on the 2nd click the "install from internet" option and click next

32./ on the next page you will be asked for a root directory, type in "C:/Android/cygwin" - (remember everything is case sensitive), then click next

33./ you will then be asked for the local package directory, change this to "C:/Android/cygpackage", then click next.

34./ ensure "direct connection" is selected and click on next

35./ click on the 3rd website from the top when it asks you for a download site (they all work, but some are quicker than others, this is the one I used), then click next.

36./ click ok on any alert messages as it downloads.

37./ you will then be shown a window asking you to select packages, type in "Make" in the search box at the top, then click the plus sign next to "Devel" to expand it, near the bottom you'll see "make: The GNU version of the 'make' utility", click on "skip" to the left of this one so that the numbers 3.82.90-1 are shown. now click next

38./ wait until downloads are finished.

-------------------------------
COPYING THE INTERPRETER

39./ navigate to C:/Android folder and create a new folder called "AGK" (all caps)

40./ open the AGK folder, press START + E to open a new window and navigate to your "C:/program files/the game creators/AGK" folder, copy the folder named "IDE" and paste it to "C:/Android/AGK" folder.

-------------------------------
COMPILE AGK PLAYER

41./ navigate to "C:/Android/AGK/IDE/apps/interpreter_android" folder and right click on the file "HardCodedCompileScript.bat" then select "open with notepad"

42./ highlight all the text and delete it, then paste this


EDIT: capital letter mistake on the Android folder. FIXED

make sure the speech marks are copied at the end of the 2nd and 3rd lines! save and close the file.

43./ now double click the file you just edited, the script should run and automatically compile the project for you, no need for any cygwin coding!

--------------------------------
BUILD AGK PLAYER IN ECLIPSE

44./ open eclipse again

45./ close the welcome screen, on the left side you should see the package explorer, right click anywhere on this and select "import", expand the general option and select "existing project into workspace", click next

43./ Click browse at the top and browse to C:/Android/AGK/IDE/apps/ and select the "interpreter_android" folder, then click ok and finish. you should now see the "AGK Player" folder on the left hand side and also lots of errors!

44./ again, right click on the package explorer and click import, and again existing project into workspace, this time import the folder "C:/Android/AGK/IDE/apps/facebook", click ok then finish. you should now see "FacebookSDK" on the left side and also some of the errors disappeared!

45./ right click on "AGK Player" in the package explorer and select properties, click on "Java compiler" and UNtick the "enable project specific settings" box at the top, click ok.

46./ Click "File" then "Open File", navigate to "C:/Android/AGK/IDE/apps/interpreter" and open the file "interpreter.cc", press CTRL + F, type in "#ifdef IDE_ANDROID" and click find, you should see a line of text which says:


delete the "//" at the start to comment this in to the code. click file and then save.

47./ right click the AGK Player file in the package explorer window and click "Android Tools" then click "Fix Project Properties" then click on "Project" at the top and then click "Clean", make sure "clean all projects" is selected, then click ok. now you should see no errors! any yellow warnings don't matter.

48./ click on "Run" at the top and then "Run" again. the AGK player is now built!


-------------------------------
CREATE YOUR GAME FOLDER

49./ navigate to "C:/Android/AGK/IDE/apps" and copy and paste the "interpreter_android" folder

50./ rename the copied folder to your games name - with NO spaces.

51./ open up your games folder that you just created, there will be a red file inside with a blank name - ".project", right click this and open with notepad

52./ on the 3rd line change "AGK Player" to your games name - no spaces. save and close.

53./ right click on the "AndroidManifest.xml" file and open with notepad

54./ read through the code and change ALL instances of "com.thegamecreators.agk_player" to "com.yourcompanyname.yourgamename" - not exactly that text but whatever your company name is and then whatever your games name is, with no spaces! I think there are 8 of these that need changing so look carefully! save, then close.

55./ open up the res folder contained in your games project folder, open the values folder, right click on "strings.xml" and open with notepad

56./ on the 3rd line change "AGK Player" to your games name, here you can have spaces as this is what text is shown on a phone for the app name. save and close.

57./ go back to your games project folder - "C:/Android/AGK/IDE/apps/*gamename*" if there is no folder called "assets" here then create it - case sensitive!

58./ open the assets folder and create another folder called "media" - case sensitive!

59./ press START + E to open a new window and navigate to your AGK project folder - "C:/Program Files/The Game Creators/AGK/Projects/*Basic or native*/*project name*

60./ open the "media" folder and copy everything within this folder and paste it to your "C:/Android/AGK/IDE/apps/*gamename/assets/media" folder

61./ close the "C:/program files/the game creators/agk etc" window if you haven't already.

62./ navigate to "C:/Android/AGK/IDE/apps/*yourgamename/assets/media" folder and rename the .byc file from your games name to "bytecode.byc"

63./ go back to your games main project folder - "C:/Android/AGK/IDE/apps/*gamesname" and double click the file "HardCodedCompileScript.bat", wait until it is finished.

---------------------------------
IMPORT GAME FOLDER INTO ECLIPSE and EXPORT .APK

64./ navigate to "C:/Android/AGK/IDE/apps/*gamename/src/com/thegamecreators/agk_player" and right click the file "IAPActivity.java" open with WORDPAD (not notepad)

65./ around line 20 there will be a line that reads:


delete the "//" to comment this in to the code. also, change it to "com.*yourcompanyname.*yourgamename.R" - the same as you typed before in the "AndroidManifest.xml" file, make sure you keep the .R at the end. save it and close.

66./ in the same folder open up "MyFacebookActivity.java" in WORDPAD, do the same for line 7, delete the "//" and change it to "com.*yourcompanyname.*yourgamename.R". save it and close.

67./ go to your games main project folder - "C:/Android/AGK/IDE/apps/*yourgamename" and double click the "HardCodedCompileScript.bat"

68./ once that has finished, open eclipse

69./ right click on the package explorer window and click "import", then click "existing project into workspace" then browse for your games folder - "C:/Android/AGK/IDE/apps/*gamename" and click ok then finish.

70./ right click on your games project folder in the package explorer and click "Android Tools" then click "Fix Project Properties"

71./ click on "Project" at the top then click "Clean", you should now have no errors.

72./ click on "File" then "Export" then expand the Android option and select "Export Android Application" then click next

73./ select your games project from the browse window and click next

74./ create a new keystore by filling in the details - the location is where you want to store it and the filename, create a password for it and confirm the password, then fill in your details - (the validity MUST be over 50 years. I put 1000 just to be on the safe side.) then select your destination path for the .APK file - you can reuse the keystore for every app you create for android.

75./ you now have a working .apk file! just copy the .apk file to your phone and run it from your phone!, if there are errors then you have either gone wrong somewhere in this list, or there is an error with your AGK code.


SOME TIPS!:

* make sure you program in your music and sound files on AGK in the correct casing e.g if the file name is "Music.mp3" then don't type "music.mp3" type it with a capital M.

* Test your app on as many android devices as possible.

* This help list will only work on Android 2.3.1 or above operating systems
Wednesday, 10 February 2016

Solutions to Common MySQL Problems

MySQL is one of the most popular database engines, and with good reason. Once configured properly, it can help connect thousands of databases to servers and do so at relatively low cost. Plus, since it’s such a common tool, you’re unlikely to run into issues where servers don’t recognize it or you can’t get help configuring it to do what you want it to do. Sometimes, though, you will run into errors–especially configuration errors–that can be frustrating or confusing. If you’re having a hard time with MySQL, you may be running into one of these common problems.
Problem #1: High disk usage. Some MySQL users find that as they expand their operations, using MySQL for a large number of databases, it begins to take up too much disk space. Servers begin looking for data on different parts of the disk at the same time, which can slow or completely halt disk operation.

Solution: Configure MySQL to work mainly with memory, not disks.MySQL takes up far less memory than it does disk space, so the more you can get it to use your computers’ RAM instead of looking for data on disks, the more smoothly it will run. In particular, MySQL can be configured to use available RAM whenever possible and to put temporary tables in memory instead of on hard disks. If you have RAM available on your servers, this solution should speed things up. Just remember that the more databases you have, the more memory MySQL will need.
Problem #2: Losing connection to the server. If MySQL loses its connection to the server in the middle of data transfers, it will generate error messages instead of transferring the data as needed. This can be the result of a network problem, so your first step is always to check your network connections. If this problem occurs frequently, however, you may need to reconfigure MySQL.
Solution: Lost connections often happen because MySQL is configured to time out after only 30 seconds, which may not be enough time for large data transfers. Try configuring net_read_timeout to 60 seconds or longer. If you are timing out on initial connect, reconfigure connect_timeout to at least 10 seconds. This often happens if your connection is slow, so consider upgrading your network to connect faster as well.
Problem #3: Getting a “too many connections” error. As you expand your operations, you may need more computers to be able to connect to MySQL. If you don’t reconfigure MySQL, it will refuse some of these connections and generate a “too many connections” error message.
Solution: Reconfigure MySQL to accept more connections. To do this, change your max_connections variable. The default is 151; you can set it to whatever number accommodates the number of connections you need. You may also need to increase your open_files_limit to accommodate the number of connections open on your server at the same time.

How to install OpenERP 7.0 on Ubuntu 12.04 LTS

Introduction

Welcome to the latest of our very popular OpenERP installation “How Tos”.
The new release of OpenERP 7.0 is a major upgrade and a new Long Term Support release; the 7.0 Release Notes extend to over 90 pages! The most noticeable change is a complete re-write of the User Interface that features a much more modern look and feel.

OpenERP 7.0 is not only better looking and easier to use, it also brings many improvements to the existing feature-set and adds a number of brand new features which extend the scope of the business needs covered by OpenERP. Integration of social network capabilities, integration with Google Docs and LinkedIn, new Contract Management, new Event Management, new Point of Sale, new Address Book, new Fleet Management,… are only some of the many enhancements in OpenERP 7.0.

The How To

Following that introduction, I bet you can’t wait to get your hands dirty…
Just one thing before we start: You can simply download a “.deb” package of OpenERP and install that on Ubuntu. Unfortunately that approach doesn’t provide us (Libertus Solutions) with enough fine-grained control over where things get installed, and it restricts our flexibility to modify & customise, hence I prefer to do it a slightly more manual way (this install process below should only take about 10-15 minutes once the host machine has been built).
So without further ado here we go:

Step 1. Build your server

I install just the bare minimum from the install routine (you may want to install the openssh-server during the install procedure or install subsequently depending on your needs).
After the server has restarted for the first time I install the openssh-server package (so we can connect to it remotely) and denyhosts to add a degree of brute-force attack protection. There are other protection applications available: I’m not saying this one is the best, but it’s one that works and is easy to configure and manage. If you don’t already, it’s also worth looking at setting up key-based ssh access, rather than relying on passwords. This can also help to limit the potential of brute-force attacks. [NB: This isn’t a How To on securing your server…]
sudo apt-get install openssh-server denyhosts
Now make sure your server has all the latest versions & patches by doing an update:
sudo apt-get update
sudo apt-get dist-upgrade
Although not always essential it’s probably a good idea to reboot your server now and make sure it all comes back up and you can login via ssh.
Now we’re ready to start the OpenERP install.

Step 2. Create the OpenERP user that will own and run the application

sudo adduser --system --home=/opt/openerp --group openerp
This is a “system” user. It is there to own and run the application, it isn’t supposed to be a person type user with a login etc. In Ubuntu, a system user gets a UID below 1000, has no shell (it’s actually /bin/false) and has logins disabled. Note that I’ve specified a “home” of/opt/openerp, this is where the OpenERP server code will reside and is created automatically by the command above. The location of the server code is your choice of course, but be aware that some of the instructions and configuration files below may need to be altered if you decide to install to a different location.
[Note: If you want to run multiple versions of OpenERP on the same server, the way I do it is to create multiple users with the correct version number as part of the name, e.g. openerp70, openerp61 etc. If you also use this when creating the Postgres users too, you can have full separation of systems on the same server. I also use similarly named home directories, e.g. /opt/openerp70, /opt/openerp61 and config and start-up/shutdown files. You will also need to configure different ports for each instance or else only the first will start.]
A question I have been asked a few times is how to run the OpenERP server as the openerp system user from the command line if it has no shell. This can be done quite easily:
sudo su - openerp -s /bin/bash
This will su your current terminal login to the openerp user (the “-” between su and openerp is correct) and use the shell /bin/bash. When this command is run you will be in openerp’s home directory: /opt/openerp.
When you have done what you need you can leave the openerp user’s shell by typing exit.

Step 3. Install and configure the database server, PostgreSQL

sudo apt-get install postgresql
Then configure the OpenERP user on postgres:
First change to the postgres user so we have the necessary privileges to configure the database.
sudo su - postgres
Now create a new database user. This is so OpenERP has access rights to connect to PostgreSQL and to create and drop databases. Remember what your choice of password is here; you will need it later on:
createuser --createdb --username postgres --no-createrole --no-superuser --pwprompt openerp
Enter password for new role: ********
Enter it again: ********
Finally exit from the postgres user account:
exit

Step 4. Install the necessary Python libraries for the server

sudo apt-get install python-dateutil python-docutils python-feedparser python-gdata \
python-jinja2 python-ldap python-libxslt1 python-lxml python-mako python-mock python-openid \
python-psycopg2 python-psutil python-pybabel python-pychart python-pydot python-pyparsing \
python-reportlab python-simplejson python-tz python-unittest2 python-vatnumber python-vobject \
python-webdav python-werkzeug python-xlwt python-yaml python-zsi
With that done, all the dependencies for installing OpenERP 7.0 are now satisfied (note that there are some new packages required since 6.1).

Step 5. Install the OpenERP server

I tend to use wget for this sort of thing and I download the files to my home directory.
Make sure you get the latest version of the application: at the time of writing this it’s 7.0. I got the download links from their download pages(note there are also debrpm and exe builds in this area too). There isn’t a static 7.0 release tarball as such anymore, but there is a nightly build of the 7.0 source tree which should be just as good and will contain patches as and when things get fixed. The link below is to the source tarball for the 7.0 branch.
Note: As an alternative method of getting the code onto your server, Jerome added a very useful comment showing how to get it straight from launchpad. Thanks!
wget http://nightly.openerp.com/7.0/nightly/src/openerp-7.0-latest.tar.gz
Now install the code where we need it: cd to the /opt/openerp/ directory and extract the tarball there.
cd /opt/openerp
sudo tar xvf ~/openerp-7.0-latest.tar.gz
Next we need to change the ownership of all the the files to the OpenERP user and group we created earlier.
sudo chown -R openerp: *
And finally, the way I have done this is to copy the server directory to something with a simpler name so that the configuration files and boot scripts don’t need constant editing (I called it, rather unimaginatively, server). I started out using a symlink solution, but I found that when it comes to upgrading, it seems to make more sense to me to just keep a copy of the files in place and then overwrite them with the new code. This way you keep any custom or user-installed modules and reports etc. all in the right place.
sudo cp -a openerp-7.0 server
As an example, should OpenERP 7.0.1 come out soon, I can extract the tarballs into /opt/openerp/ as above. I can do any testing I need, then repeat the copy command so that the modified files will overwrite as needed and any custom modules, report templates and such will be retained. Once satisfied the upgrade is stable, the older 7.0 directories can be removed if wanted.
That’s the OpenERP server software installed. The last steps to a working system is to set up the configuration file and associated boot script so OpenERP starts and stops automatically when the server itself stops and starts.

Step 6. Configuring the OpenERP application

The default configuration file for the server (in /opt/openerp/server/install/) is actually very minimal and will, with only one small change work fine so we’ll simply copy that file to where we need it and change it’s ownership and permissions:
sudo cp /opt/openerp/server/install/openerp-server.conf /etc/
sudo chown openerp: /etc/openerp-server.conf
sudo chmod 640 /etc/openerp-server.conf
The above commands make the file owned and writeable only by the openerp user and group and only readable by openerp and root.
To allow the OpenERP server to run initially, you should only need to change one line in this file. Toward to the top of the file change the linedb_password = False to the same password you used back in step 3. Use your favourite text editor here. I tend to use nano, e.g.
sudo nano /etc/openerp-server.conf
One other line we might as well add to the configuration file now, is to tell OpenERP where to write its log file. To complement my suggested location below add the following line to the openerp-server.conf file:
logfile = /var/log/openerp/openerp-server.log
Once the configuration file is edited and saved, you can start the server just to check if it actually runs.
sudo su - openerp -s /bin/bash
/opt/openerp/server/openerp-server
If you end up with a few lines eventually saying OpenERP is running and waiting for connections then you are all set.
On my system I noticed the following warning:
2012-12-19 11:53:51,613 6586 WARNING ? openerp.addons.google_docs.google_docs: Please install latest gdata-python-client from http://code.google.com/p/gdata-python-client/downloads/list
The Ubuntu 12.04 packaged version of the python gdata client library is not quite recent enough, so to install a more up-to-date version I did the following (exit from the openerp user’s shell if you are still in it first):
sudo apt-get install python-pip
sudo pip install gdata --upgrade
Going back and repeating the commands to start the server resulted in no further warnings
sudo su - openerp -s /bin/bash
/opt/openerp/server/openerp-server
If there are errors, you’ll need to go back and find out where the problem is.
Otherwise simply enter CTL+C to stop the server and then exit to leave the openerp user account and go back to your own shell.

Step 7. Installing the boot script

For the final step we need to install a script which will be used to start-up and shut down the server automatically and also run the application as the correct user. There is a script you can use in /opt/openerp/server/install/openerp-server.init but this will need a few small modifications to work with the system installed the way I have described above. Here’s a link to the one I’ve already modified for 7.0.
Similar to the configuration file, you need to either copy it or paste the contents of this script to a file in /etc/init.d/ and call it openerp-server. Once it is in the right place you will need to make it executable and owned by root:
sudo chmod 755 /etc/init.d/openerp-server
sudo chown root: /etc/init.d/openerp-server
In the configuration file there’s an entry for the server’s log file. We need to create that directory first so that the server has somewhere to log to and also we must make it writeable by the openerp user:
sudo mkdir /var/log/openerp
sudo chown openerp:root /var/log/openerp

Step 8. Testing the server

To start the OpenERP server type:
sudo /etc/init.d/openerp-server start
You should now be able to view the logfile and see that the server has started.
less /var/log/openerp/openerp-server.log
If there are any problems starting the server you need to go back and check. There’s really no point ploughing on if the server doesn’t start…

OpenERP 7 Database Management Screen
If the log file looks OK, now point your web browser at the domain or IP address of your OpenERP server (or localhost if you are on the same machine) and use port 8069. The url will look something like this:
http://IP_or_domain.com:8069
What you should see is a screen like this one (it is the Database Management Screen because you have no OpenERP databases yet):
What I do recommend you do at this point is to change the super admin password to something nice and strong (Click the “Password” menu). By default this password is just “admin” and knowing that, a user can create, backup, restore and drop databases! This password is stored inplain text in the /etc/openerp-server.conf file; hence why we restricted access to just openerp and root. When you change and save the new password the /etc/openerp-server.conf file will be re-written and will have a lot more options in it.
Now it’s time to make sure the server stops properly too:
sudo /etc/init.d/openerp-server stop
Check the logfile again to make sure it has stopped and/or look at your server’s process list.

Step 9. Automating OpenERP startup and shutdown

If everything above seems to be working OK, the final step is make the script start and stop automatically with the Ubuntu Server. To do this type:
sudo update-rc.d openerp-server defaults
You can now try rebooting you server if you like. OpenERP should be running by the time you log back in.
If you type ps aux | grep openerp you should see a line similar to this:
openerp 1491 0.1 10.6 207132 53596 ? Sl 22:23 0:02 python /opt/openerp/server/openerp-server -c /etc/openerp-server.conf
Which shows that the server is running. And of course you can check the logfile or visit the server from your web browser too.

OpenERP 70 Main Setup Screen
That’s it! Next I would suggest you create a new database filling in the fields as desired. Once the database is initialised, you will be directed straight to the new main configuration screen which gives you a fell for the new User Interface in OpenERP 7 and shows you how easy it is to set up a basic system.

CodeIgniter Installation Instructions

CodeIgniter is installed in four steps:
  1. Unzip the package.
  2. Upload the CodeIgniter folders and files to your server. Normally the index.php file will be at your root.
  3. Open the application/config/config.php file with a text editor and set your base URL. If you intend to use encryption or sessions, set your encryption key.
  4. If you intend to use a database, open the application/config/database.php file with a text editor and set your database settings.
If you wish to increase security by hiding the location of your CodeIgniter files you can rename the system and application folders to something more private. If you do rename them, you must open your main index.php file and set the $system_folder and $application_folder variables at the top of the file with the new name you've chosen.
For the best security, both the system and any application folders should be placed above web root so that they are not directly accessible via a browser. By default, .htaccess files are included in each folder to help prevent direct access, but it is best to remove them from public access entirely in case the web server configuration changes or doesn't abide by the .htaccess.
After moving them, open your main index.php file and set the $system_folder and $application_folder variables, preferably with a full path, e.g. '/www/MyUser/system'.
One additional measure to take in production environments is to disable PHP error reporting and any other development-only functionality. In CodeIgniter, this can be done by setting the ENVIRONMENT constant, which is more fully described on the security page.
That's it!
If you're new to CodeIgniter, please read the Getting Started section of the User Guide to begin learning how to build dynamic PHP applications. Enjoy!

Friday, 18 December 2015

Wordpress : Managing Plugins

WordPress Plugins are composed of PHP scripts that extend the functionality of WordPress. They offer new additions to your blog that either enhance features that were already available or add otherwise unavailable new features to your site.
The majority of WordPress users don't require Plugins, or only require a few, such as Plugins dealing with comment spam or customized post listings. Other users enjoy the varied options Plugins provide such as frequently updated weather reports, post word counts, rating systems, and more. WordPress Plugins are optional, based upon the needs of the user, and thus they are not incorporated into the core of WordPress.
Plugins available via the WordPress Plugins Directory site are designed by volunteers and are usually free to the public. WordPress Plugins hosted in the WordPress Plugins Directory are considered thoroughly tested and "safe." Remember, WordPress Plugins are the responsibility of the author and the user, and they are typically works-in-progress as WordPress grows and expands.

If you want to develop your own Plugins, there is a comprehensive list of resources atPlugin Resources.

Finding Plugins

You can find WordPress Plugins in the Administration Screens > Plugins > Add Newscreen, or directly via the WordPress Plugins Directory.

Plugin Compatibility and Updates

Check the WordPress Plugin listing on the Plugins List on your WordPress site, or on the WordPress Plugins Directory to determine compatibility and if updates are available.
If a WordPress Plugin update is available, it will be shown on the Dashboard screen, an alert on the Plugin's menu title, and on the Plugin List. Follow the instructions to update the Plugin.
If a WordPress Plugin is not compatible or updated for the next release of WordPress, contact the Plugin author directly for information on the next update and compatibility issues.

Installing Plugins

Automatic Plugin Installation


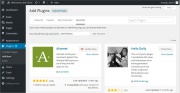
WordPress Plugins Screen
To add a WordPress Plugin using the built-in plugin installer:
  1. Go to Plugins > Add New.
  2. Type in the name of the WordPress Plugin or descriptive keyword, author, or tag in Search Plugins box or click a tag link below the screen.
  3. Find the WordPress Plugin you wish to install.
    1. Click Details for more information about the Plugin and instructions you may wish to print or save to help setup the Plugin.
    2. Click Install Now to install the WordPress Plugin.
  4. The resulting installation screen will list the installation as successful or note any problems during the install.
  5. If successful, click Activate Plugin to activate it, or Return to Plugin Installer for further actions.
Some WordPress Plugins require more steps to customize them. The Details ReadMe file should contain step-by-step instructions. After installation, this information is available on the Plugins Screen for each Plugin. If you are having problems with a WordPress Plugin, see the Troubleshooting section.
For information on how to install a WordPress Plugin manually, see our manual installation guide below.

Manual Plugin Installation

There are a few cases when manually installing a WordPress Plugin is appropriate.
  • If you wish to control the placement and process of installing a WordPress Plugin.
  • If your server does not permit automatic installation of a WordPress Plugin.
  • The WordPress Plugin is not in the WordPress Plugins Directory.
Installation of a WordPress Plugin manually requires FTP familiarity and the awareness that you may put your site at risk if you install a WordPress Plugin incompatible with the current version or from an unreliable source.
Backup your site completely before proceeding.
To install a WordPress Plugin manually:
  1. Download your WordPress Plugin to your desktop.
  2. If downloaded as a zip archive, extract the Plugin folder to your desktop.
  3. Read through the "readme" file thoroughly to ensure you follow the installation instructions.
  4. With your FTP program, upload the Plugin folder to the wp-content/plugins folder in your WordPress directory online.
  5. Go to Plugins screen and find the newly uploaded Plugin in the list.
  6. Click Activate to activate it.
Check the Details readme file for customization and further instructions.

Plugin Favorites

The ability to favorite a plugin was added to the WordPress Plugins Directory in 2012. WordPress Version 3.5 introduced the ability to display and easily install a user's favorite plugins from the Add New plugins page of the dashboard.

WordPress Plugins Directory


A favorite plugin in WordPress Plugins Directory
To favorite a plugin:
  1. You must be logged in to the WordPress Plugins Directory
  2. While you are viewing a plugin's page, click the Favorite link below the plugin's download button.
Once you have favorited a plugin, it will show up in your public profile, as well as your rating of the plugin, if applicable.

Installing Favorite Plugins


Viewing a user's favorite plugins in the dashboard
To install plugins from a user's list of favorites within the WordPress dashboard:
  1. Go to Plugins > Add New.
  2. Under Favorites, type in the WordPress.org username of the user who's favorites you would like to install and click Get Favorites.
  3. Follow the Installing Plugins above to install the plugins you would like.

Troubleshooting

Occasionally, a WordPress Plugin may not work as expected, or at all, or conflict with another WordPress Plugin.
  1. Check you've followed the instructions included with the WordPress Plugin exactly.
  2. Check that the Plugin has been activated in your Plugin Screen of your Administration Screens.
  3. Deactivate and re-activate the Plugin to see if this makes it work.
  4. Search the WordPress Support Forums for the name of the Plugin and keywords associated with the problem you are experiencing.
  5. Check the WordPress Plugins Directory for the notes on the Plugin and links to issues reported in the Forums.
  6. Go to the website of the Plugin author and check their blog and Plugin page for known issues or advice.
  7. Search the web with the name of the Plugin and keywords associated with the trouble.
  8. Post a question on the WordPress Support Forums with the name of the Plugin and specific problems in the title. For advice on how to improve your chances of getting help, see Finding WordPress Help.
  9. If the problem persists and you cannot seem to solve it, check to see if there are any similar WordPress Plugins that you can try instead.
  10. Try the following tips below for troubleshooting the problem yourself if you have no fear of going "under the hood."

Advanced Troubleshootings

If you are experiencing problems with a Plugin you installed or one that stopped working after upgrades, the following are the steps you need to take to troubleshoot the Plugin:
  1. If you manually installed the Plugin, use your FTP program to delete the Plugin folder/files and upload it again.
  2. If you made changes to the WordPress Theme template files to add the Plugin's code or customization, make sure they are correct, spelled right (including letter case), and placed in the appropriate place, e.g., within the WordPress Loop or outside of it.
  3. Check that you uploaded the file to the Plugins folder under wp-content. If you are uploading a new version to replace the old, delete the old version prior to uploading the new one.
  4. If the Plugin does not appear in the Plugins List, view the Plugin's main file in the Plugin Editor to ensure the Plugin's header textexists and is properly formed.
  5. If you're using a custom WordPress Theme, try using one of the default WordPress Themes to see if your issue is Theme related. If it is, contact the Theme developer for assistance.
  6. Deactivate all your Plugins to ensure they're not causing the problem. Reactivate the problematic one. If it works, there maybe a conflict. Activate the others one-by-one and test the site to see if the problem ceases or returns, which may indicate the conflicting Plugin.

Uninstalling Plugins

To uninstall a WordPress Plugin:
  1. Go to Plugins screen.
  2. Find the Plugin you wish to deactivate and uninstall.
  3. Click Deactivate.
The Plugin will initiate the deactivation.
Most WordPress Plugins have an option to completely uninstall themselves, though not all. If you wish to remove a WordPress Plugin permanently:
  1. Check the WordPress Plugin instructions in the Details readme file on how to properly uninstall the Plugin.
  2. If the WordPress Plugin required the addition of code to the WordPress Theme, manually edit the Theme files to remove it.
  3. Deactivate the Plugin and remove it manually through your FTP program.
    1. Login to the site via your FTP Program.
    2. Go to the WordPress Plugins Directory and find where the Plugin is installed.
    3. Delete the WordPress Plugin folder and/or files from your server.

WordPress Plugin Tips

The following are WordPress Plugin tips and techniques for advanced users and developers.

Plugin Management

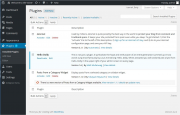
Plugins are managed from the Plugins Screen in the Administration Screens of your WordPress site. All Plugins listed on this screen are found in your wp-content/plugins directory. Each Plugin has a description in its header section of what it does, an author and website to refer to, and a version number. If you do not see the Plugin in the list of installed Plugins, most likely it is missing the"File Header":
<?php
/*
Plugin Name: Magic Plugin
Plugin URI: http://example.com/magic-plugin
Description: Magic Plugin performs magic
Version: 2.3
Author: Mr. Magic
Author URI: http://example.com/
*/
The header section defines:
Plugin Name 
Shows the Plugin's name, and links to the Plugin's website if one is provided. Plugins listed in bold are currently active.
Version 
The version number of the Plugin.
Description 
The author's description of what the Plugin does and who authored the Plugin.
Action 
Allows you to activate, deactivate, or edit the Plugin.
New version available 
If a newer version of a Plugin is available in the WordPress Plugins Directory a message will display along with a link to the location to download that new version.

Theme Changes

Most WordPress Plugins no longer require direct modification to a WordPress Theme. If you are using a WordPress Plugin that does no, you need to know:
  1. Updates to the WordPress Theme may remove the Plugin modification code. Use a Child Theme or make notes to remind yourself to re-add the Plugin code to the updated Theme.
  2. If you change Themes, these changes will not carry over automatically to the new Theme. You will need to copy or add them manually to the new WordPress Theme, even if you use a Child Theme as the Child Theme is not associated with the new Theme.
  3. Upgrading WordPress may make changes to the code which could conflict with your WordPress Theme modifications. Use a Child Theme or manually check the Plugin's code to ensure it is still active.

Must-Use Plugins

If you are using the Multisite version of WordPress, Must Use Plugins are special WordPress Plugins installed in a special directory next to the normal /plugins/ dir (/mu-plugins/). They are 'must-use' because once their file is placed in the /mu-plugins/ directory they are instantly activated and cannot be de-activated using the Plugins Screen.
Must-use Plugins are useful for installing WordPress Plugins on all sites in a Multisite installation to make WordPress Plugins' functionalities available across the entire blog network. They are loaded before normal Plugins by PHP, which means that code and hooked-functions registered in an Must-use Plugin can be assumed available to all other Plugins.
See Must Use Plugins and Create A Network for more details.

Hiding Plugins When Deactivated

When activated, some WordPress Plugins add tags to the template files. Upon such a Plugin's deactivation, these tags may remain in place and can affect the look and/or functionality of the Theme, resulting in errors or even failures to load. It is therefore imperative to prevent the Plugin from being detected and used, if it is deactivated.
To determine if such a condition exists, you can add some php code to the template file where the Plugin was used, and perform a simple function_exists() check. To do so, add the code in the example below and configure it for the function you'd like to check. Then upload the modified template to your WordPress Content folder.
The if (function_exists()) checks for the Plugin, and if it exists (activated or not), it will use it. If it returns FALSE or "not found", it will ignore the Plugin tag and continue loading the page.
<?php
if (function_exists('FUNCTION NAME')) {
FUNCTION_NAME();
}
?>
This example Plugin uses a function called alex_get_shoutbox() to print out its contents.
<?php
if (function_exists('alex_get_shoutbox')) {
alex_get_shoutbox();
}
?>

.

Popular Posts

Powered by Blogger.